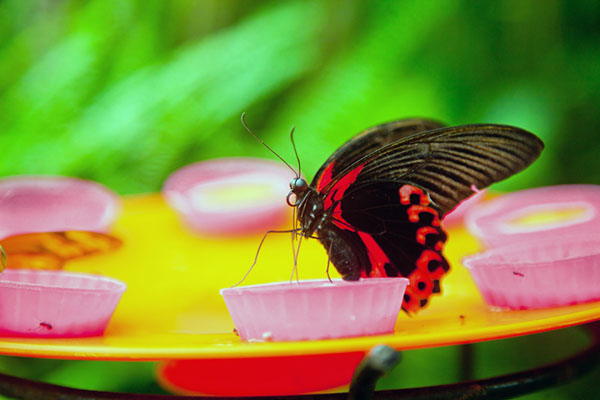
Want to attract butterflies to your garden? This summer crafts project is for you.

Want to attract butterflies to your garden? This summer crafts project is for you.
When it comes to insects, you usually want to keep them as far away from the house as possible. Butterflies, however, are the exception to this rule. The varied patterns and vibrant colors splashed across their delicate wings are a treat for everyone in your household. And as an added bonus, they help pollinate your summer flower and vegetable gardens.
So how do you attract butterflies to your yard? Try these butterfly feeders, which you can make yourself. Whether you’re looking for educational summer crafts for the kids or to add some lively color to your garden, building a butterfly feeder is the perfect project.
First Things First: What Do Butterflies Eat?
Before you head out to the arts and crafts store to pick up supplies for your feeder, you need to know what foods butterflies enjoy.Butterflies don’t eat like we do. Instead, they use a tube called a proboscis to drink. Some feed on organic material like rotting fruit, while others use their proboscises to drink nectar from flowers.
You can attract butterflies using homemade nectar or old fruit, but we recommend sticking to nectar to help avoid attracting flies and stinging pests like wasps and hornets.
You can make your own nectar by using two simple household ingredients: granulated sugar and water. Making the nectar is easy.
How to Make Butterfly Food
- Mix 1 cup of granulated sugar with 4 cups of water in a large pot.
- Bring the solution to a boil until the sugar has dissolved.
- Let your nectar cool down to room temperature before kicking off your summer crafts session.
DIY Butterfly Feeders
Simple Dish Feeder
For this feeder, you’ll need:- A large dish with a rim, like a terracotta planter base or a ceramic pie plate.
- Thick garden twine or a plant holder to hang your finished summer crafts.
- Brightly colored kitchen sponges.
- Your butterfly food, of course.

Now you’ll need to break out some sponges. Butterflies can’t land in liquid, so soak the sponges in your homemade sugar solution before placing it in your hanging dish. Brightly colored sponges will mimic one of butterflies’ natural food sources — flowers — and help attract a larger crowd to your feeder. Once your sponges have dried out, simply load them up with nectar again.
Jar Feeder
Gather the following arts and crafts supplies when you’re ready to start seeing those vivid colors flutter through your yard:- A small glass jar with a tight-fitting lid. (Old jelly jars or Mason jars are perfect.)
- A hammer and nail.
- Protective eyewear.
- A colorful kitchen sponge.
- Scissors.
- Thick string or garden twine.
- Your homemade nectar.
Next, you’ll cut a piece of the sponge (about 2 ¾ inches by ½ inch) and pull it through the hole in the jar lid. You want a snug fit. And, remember, a brightly colored sponge will attract more butterflies.
Now soak the sponge in your homemade nectar. You’ll also fill the jar with nectar before tightly screwing the lid back on. The sponge works as a wick, and will provide your butterflies with a constant flow of that sugary solution they love so much.
To make a hanger for your feeder, tie a length of twine around the mouth of your jar. Then cut two more long pieces of twine (about 2 ½ feet in length). Tie one of the long pieces to the twine around the mouth of the jar. Do the same with the other end of this long piece, pretty much on the opposite side of the jar. While doing this, keep in mind that the sponge will need to be pointing towards the ground when you’re finished.
Repeat this process with the remaining long piece, so that your two long pieces crisscross at the top. Your long pieces should create two loops. Join the tops of the loops together with a smaller piece of twine.
Using the loops, hang the jar from a shady tree branch where you can see it from inside. Now sit back and wait for your summer crafts to attract those butterflies.
Personalize Your Arts and Crafts
Add a personal touch to your feeders by using multicolored twine or by painting your jars and the bases of your feeder dishes. You can also hang flowers or ribbons from your feeder, which may even bring more butterflies to your yard.While making a butterfly feeder is an easy crafts project that anyone can enjoy, it does require spending time outside. Before you start crafting, keep mosquitoes away by applying repellent and wearing clothes that keep you covered. You don’t want your summer crafts fun to be spoiled by itching and scratching.
Sources:
• Grow Real Food
• Animals
• North American Butterfly Association
• Home Science Tools


